
View of the fountain and pool from the living room. A shot from behind its windows and the other from just outside the living room.

That's the family room with door panel slid aside; and the staghorn fern's been shifted left.
The waterspout made a racket splashing into the pool and large round stones in a plant pot were used to break the impact noise.
An angled view from the side/ rear showing the house main front door. Ah, there's the white coloured can of very effective we used to coat all surfaces of those Bali stone stuff.
All in, not too bad a little job that took about 10 days, from visiting nurseries and stone supplier yards, to path slab laying to planting.
Be sure to visit us again in about six months to see more photographs on how the garden would have grown.
Done! - pool and Fountain completed
The pool is in
Okay, the fibreglass pool was in. Bought from the same Sg Buloh supplier of Balinese styled garden rquirements etc. Got that bowl on stand from same place. Got 3 sets in fact as they were on offer ie buy 2 get 1 free. Same place we got the slabs.
Here, we're looking at the column on which will be mounted the fountain waterspout's Bali tile.


Those are the living room windows in the left of the photograph. White spray paint that we used to mark the ground in laying out the garden beds, etc. And WD40 to lubricate and cleanse the old garden secateurs dug out for use.
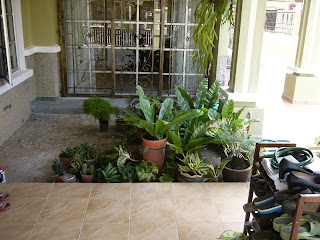
The Pool area in original state

Here's where we decided to have a pool, and a waterspout fountain gushing out from a mask or tile mounted on the column.
That's the family room door straight ahead, while the main door to the house is to our left, beyond those pink flip-flops.
Got a nice Balinese tile. That's it wrapped in brown hardpaper beside that cracked pot (repaired with mortar). Click photograph to enlarge and you can see part of the tile.
As the fibleglass pool was 10 inch deep, we needed to dig only about 5 inches to have the pool rim level or just below the surrounding floor level, as the dirt level had been deliberately left about 5 inches lower.
Done! main garden plantings completed

The job doesn't look impressive in this shot. But it certainly did on site. And just give it another six months .....
The potted plant on pedestal was a sectional area point of interest. The pedestal represented in this photo by a "whatever that's called" will be replaced by a proper item in due course, of course.
I like the firm backing provided by the Mother-in-law's-tongue (Sansiviera sp) on the drain edge side of this bed. They'll also give a bit of brightness when viewed from porch.
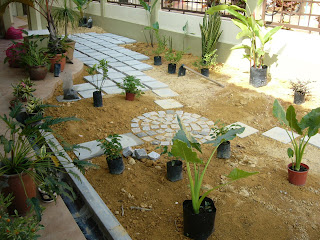
Additional planting
The Heliconia bed directly in front of the house main door (which actually doesb't face the street but to the left ie to LHS the neighbour's property) was plumped up with 3 large bagged specimens that bore deep red flowers (two of them) and light red-pink with yellow border.
The planting was brought all the way forward right up to the edge of the cobblestone circle to ensure restricting a full length view of the garden.
The first bed facing one (on stepping onto pathway) was strengthened with Thaumatococcus danielli from under the Plumeria tree, along the wall till the first Heliconia bed.
To our left, another large-leafed ginger (?) was added. This was also brought far out to be nearer the pathway.
BL is seen here packing in aloe vera as an underplanting for the wild yams.
That potted Philodendron (three plants in the pot actually) (in shot below) would be planted along the open drain edge of the bed at three spots. They will in due course conceal a large part of the drain.
Cover plants under the citrus on LHS of circle. The opposite side ie under the Jasmines will be similarly underplanted.
Watering was immediately carried out for new plantings. Good for the plants and good to stretch the cramped muscles. That's BengTeck handling the hose.
Planting

A large branched Frangipanni cutting from MIL's house to provide big-plant effect on RHS on first stepping onto footpath from the gate.
We got it two days before ie before soil delivery and bed formation and it didn't look good when planted but the retained last few leaves and flowers freshened up the following days, indicating a good chance of a good establishment.
The next stretch along the common wall/fence was for Heliconias of the big size variety. Made sure not to include common orange coloured shorties.
Between the two tall stuff and at midway between path and wall were planted three Murraya. Just wait till they get bigger and loaded with flowers.
BTW, the main aimss were to provide screening against neighbour's view of our property, and to prevent the whole garden from being seen all at once by visitors. And, lots of greenery, colour, and fragrance.
The tall Heliconias were strengthened all the way out right up to the path. This was to prevent view of the rest of the garden until one takes the next bend.
On the LHS, which in fact will be seen and felt first, are these tall weedlike plants that have Thaumatococcus-like form and leaves. They grow to 8 feet tall and should block out premature views of the rest of the garden. The form good-sized clumps too and this should add to the desired screening objective.
Round the first bend, the LHS was planted with Alpinia purpurea. These will grow to man height and be thick to cut out view of the garage porch.
The potted bottle palm, frangipanni and Dracaena hookeriana in the photo are there to give additional sceening to block view of garden.
Some Plumbagos on the RHS of the path. BL loves them.

Big yams on the right and a lemon tree on the left of the path as you step down from the main door porch. They're both to cut out views beyond. 
The bed in line with main door and circle will be planted with tall huge-flowered Heliconias which also have larger than normal leaf fronds. Their flowers are really something.
Just after them, and midway to the wall, are three Brunfelsa calycina.
Plants for the alfresco dining area and outside the dining room were mostly for colour and screening. Beyond that was the herb garden with lemon grass, a limau purut and such stuff.
The "circle"
A closer look at the outdoor entertainment area

The two slabs on the right leads from the Main Door of the house. They facilitate one exiting the main door to step into the garden.
This 5 slabs x 4 slabs area is an "in between" area.
It is a convenient site for a barby set, being just off the alfresco dining area.

This is the alfresco dining area area. A timber bench is required against the common wall.
The area beyond this is the area outside the dining room. Tall screening plants required here to provide privacy.
The furthest and narrowest part of the garden will be for herbs and such plants. Mostly shrub-size. And perhaps a "Rajah" banana and a "Solo" papaya.
and the outdoor entertainment area

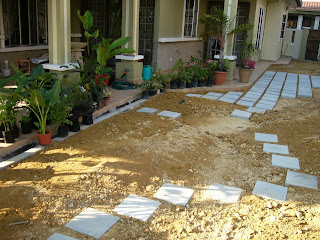
The laying of slabs for path and alfresco dining area is completed.

Soil from the mounds were scraped down to come flush with the slab surfaces. This gives the slabs a laid "in" the ground look instead of a laid "on" look. It also "locks" the slabs which would otherwise rock or jiggle when stepped upon.
The ground level of the property next door is higher and as such there is a great need for tall plants to provide a screen for privacy.


